
A final walkthrough is the last inspection of a home before movers depart, confirming nothing was left behind, no damage occurred, and all paperwork matches what actually happened on moving day. I’ve seen this five-minute step save people from weeks of disputes over missing boxes or damaged walls.
Skipping it costs more than people expect. A missed item or undocumented scratch becomes much harder to resolve once the truck pulls away.
This guide covers what the walkthrough actually checks and who’s responsible for it, how to inspect every room including easy-to-forget storage spaces, what to do when something’s missing or damaged, and how to handle paperwork and prohibited items before the crew leaves.
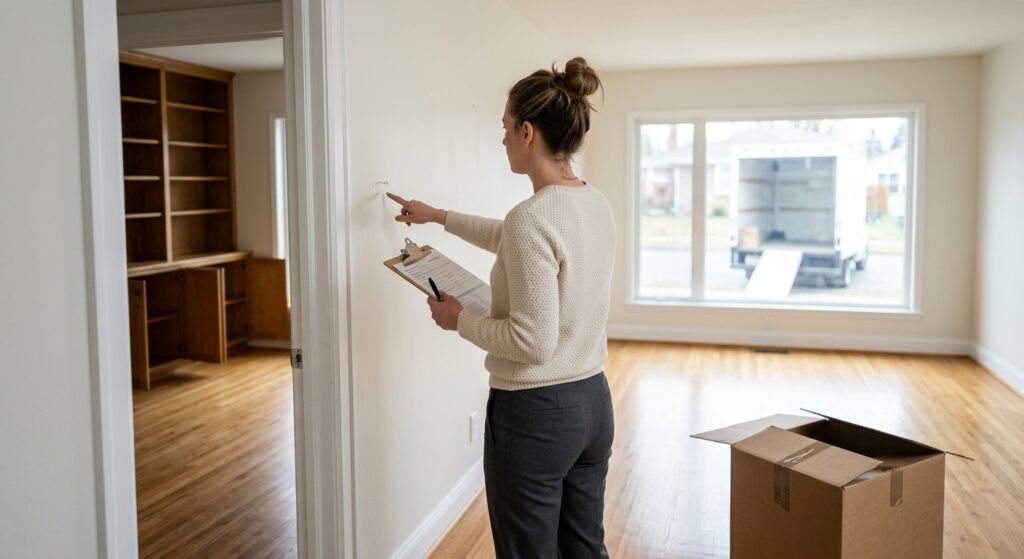
What Is a Final Walkthrough and Why It Matters
A final walkthrough is a room-by-room inspection conducted with the moving crew before they leave the old property, confirming all belongings are loaded and the home is left in acceptable condition. I treat it as the single most important five minutes of the entire move.
This step exists because moving day moves fast, and crews working under time pressure can miss a shelf, a drawer, or a stack of items tucked behind a door. The walkthrough catches those gaps before they become a problem.
Skipping it creates real consequences. Once the truck leaves, proving an item was forgotten or a wall was scuffed during loading becomes a matter of memory rather than evidence.
What a Final Walkthrough Actually Checks
The walkthrough checks three things: every room for leftover belongings, the home’s condition for new damage, and the loaded inventory against what the crew actually has on the truck. I walk through in the same order every time to avoid missing a space.
Why Skipping It Causes Problems Later
Disputes over missing items or damage claims become much harder to resolve without a documented walkthrough. Insurance and claims processes rely heavily on what was confirmed before the crew departed.
Who Is Responsible for the Final Walkthrough
Both the moving crew and the customer share responsibility for the final walkthrough, though the homeowner carries the final say on whether the home is clear. I always expect the lead mover to initiate this step rather than wait to be asked.
The Mover’s Role During Walkthrough
The crew lead typically walks each room alongside the customer, checking closets, cabinets, and overlooked spaces before confirming the truck is fully loaded. A good crew treats this as standard procedure, not an inconvenience.
The Customer’s Role During Walkthrough
Homeowners confirm their own belongings are accounted for and flag anything that looks off, whether that’s a missing box or a new mark on the wall. This is the moment to speak up, not after the truck leaves the driveway.
When the Final Walkthrough Happens on Moving Day
The final walkthrough happens immediately after the truck is loaded and before the crew leaves the property, marking the last chance to catch anything missed. I schedule a buffer of 15 to 20 minutes for this in every moving day timeline.
Timing Relative to Loading Completion
The walkthrough begins only once loading is fully complete, since checking rooms mid-load risks missing items still being carried out. Crews typically signal when the truck is sealed and ready.
How Long a Walkthrough Typically Takes
A thorough walkthrough for an average home takes 10 to 15 minutes, though larger properties with basements, attics, or multiple outbuildings can take longer. Rushing this step is where most oversights happen.
Room-by-Room Checklist for the Final Walkthrough
A room-by-room checklist for a final walkthrough covers every closet, storage area, and overlooked space in the home, not just the main living areas. The table below shows what to check and why it’s commonly missed.
| Area | What to Check | Why It’s Often Missed |
| Closets | Top shelves, back corners, floor items | Hidden behind hanging clothes removed earlier |
| Cabinets | Kitchen, bathroom, built-in units | Assumed empty after initial pack-out |
| Attic | Boxes, seasonal storage, insulation-adjacent items | Rarely visited during normal loading flow |
| Basement | Shelving units, utility areas, storage bins | Dim lighting makes items easy to overlook |
| Garage | Wall-mounted tools, overhead storage | Treated as separate from “the house” |
| Outdoor sheds | Garden tools, equipment, furniture | Considered outside the main moving scope |
| Mailbox | Keys, mail, forwarding materials | Not part of physical inventory, easily forgotten |
Closets, Cabinets, and Built-In Storage
Closets and cabinets hide more forgotten items than any other part of the home, especially top shelves and back corners that aren’t at eye level. I always check these with a flashlight, even during the day.
Attics, Basements, and Garages
Attics, basements, and garages get skipped more often than any other space because they feel separate from the “real” move. These areas deserve the same attention as the living room or bedrooms.
Outdoor Spaces, Sheds, and Mailboxes
Outdoor sheds, garden equipment, and even the mailbox hold items people forget belong to the move at all. A quick lap around the exterior catches what the indoor walkthrough misses.
Checking for Items Left Behind by Mistake
Checking for items left behind by mistake means physically opening every drawer, cabinet, and closet rather than relying on memory of what was packed. I’ve found the most overlooked items are small and tucked into corners nobody thinks to double check.
Commonly Forgotten Items
Items left behind most often include chargers plugged into outlets, spare keys in drawers, and seasonal decorations stored in attics. These small items rarely show up on a packing list because they’re easy to treat as incidental.
How Movers Help Spot Overlooked Belongings
Experienced crews know the typical hiding spots for forgotten items and will proactively check them during the walkthrough rather than waiting for the customer to ask. This habit comes from doing hundreds of moves, not from any formal checklist.
Verifying the Inventory List Against Loaded Items
Verifying the inventory list means confirming every item recorded on moving day paperwork actually made it onto the truck before the crew departs. This cross-check is the fastest way to catch a discrepancy while it can still be fixed on the spot.
The sentence below shows what this step protects against.
- The inventory list is created as items are loaded, with each box or furniture piece logged by the crew.
- The customer reviews the list during the walkthrough and compares it against what they remember packing.
- Any mismatch is flagged immediately, before the truck leaves the property.
- Both parties confirm the list is accurate and sign off together.
How Inventory Lists Are Created
Inventory lists are built in real time during loading, with crew members logging each item as it’s carried onto the truck. This running list becomes the reference point for the walkthrough.
What to Do About Inventory Discrepancies
A discrepancy between the inventory list and what’s actually loaded should be resolved before the crew leaves, since fixing it afterward requires far more documentation. Pointing it out on the spot is always the simpler path.
Inspecting for Pre-Existing Damage to the Home
Inspecting for pre-existing damage means documenting the home’s condition immediately after the crew finishes loading, before anyone leaves the property. This protects both the homeowner and the moving company from disputes over who caused what.
Walls, Floors, and Doorways
Walls, floors, and doorways take the most wear during a move, since furniture and boxes pass through tight spaces repeatedly. These are the first places I check for new scuffs or dents.
Documenting Damage Before Movers Leave
Photographing any damage immediately, with the crew still present, creates a clear record that’s far more useful than a memory described days later. This single habit resolves more disputes than any other step in the process.
Confirming Utilities and Final Home Preparation
Confirming utilities and preparing the home for departure means checking that essential systems are handled appropriately before the property sits empty. This step often gets overlooked because attention shifts entirely to the truck and the next address.
Utilities That Need Attention Before Departure
Utilities like water, electricity, and HVAC typically need to stay on through final cleaning or a buyer’s walkthrough, depending on the situation. Shutting things off too early can create problems for whoever handles the property next.
Securing the Home After Movers Leave
Securing the home means locking all doors and windows and confirming garage doors are closed before everyone departs. This final step takes thirty seconds but prevents an empty home from sitting vulnerable.
Reviewing Paperwork Before Movers Depart
Reviewing paperwork before the crew leaves means reading through the bill of lading and any delivery documents to confirm everything matches what was agreed upon. Signing without reading creates problems that surface weeks later during delivery.
Bill of Lading Review
The bill of lading is the contract between the customer and the moving company that lists all transported items and the agreed terms of service. I always read this line by line rather than skimming it under time pressure.
Signing Off on Delivery Documents
Delivery documents should only be signed once the inventory list, condition notes, and bill of lading all match what was physically observed. Signing prematurely removes leverage if an issue surfaces later.
What Happens If Something Is Missing or Damaged
If something is missing or damaged during the final walkthrough, the correct response is to report it immediately to the crew lead before they leave the property. Waiting until later shifts the burden of proof entirely onto the customer.
Reporting a Problem During the Walkthrough
Reporting a problem on the spot allows the crew to search the truck or retrace their steps while the information is still fresh. This is the single most effective moment to resolve an issue.
Filing a Claim After the Move
A claim filed after the move requires documentation such as photos, the inventory list, and the bill of lading to support the case. The process takes longer and carries more uncertainty than resolving the issue during the walkthrough itself.
Prohibited and Non-Allowable Items Check
A prohibited items check during the final walkthrough confirms no non-allowable items were accidentally loaded onto the truck, since movers are legally restricted from transporting certain materials. The table below shows common categories movers cannot transport.
| Category | Examples | Why It’s Restricted |
| Flammable materials | Propane tanks, gasoline, paint thinner | Fire and explosion risk during transport |
| Corrosive substances | Pool chemicals, certain cleaning agents | Can damage other belongings or injure crew |
| Perishable food | Refrigerated and frozen items | Spoilage risk over multi-day transit |
| Hazardous materials | Ammunition, fireworks, pesticides | Federal transport regulations |
| High-value items | Cash, jewelry, important documents | Liability limits don’t cover full replacement |
Items Movers Cannot Legally Transport
Movers cannot legally transport hazardous materials like propane, pool chemicals, or fireworks due to federal transportation safety regulations. These restrictions exist to protect the crew and every other shipment on the truck.
What to Do With Items Left Behind for This Reason
Items flagged as non-allowable should be set aside before loading day, not discovered during the final walkthrough. Planning ahead avoids the awkward moment of a crew refusing to load something at the last minute.
Final Walkthrough for Long-Distance vs. Local Moves
The final walkthrough differs between long-distance and local moves mainly in documentation depth and timing pressure, since interstate shipments carry stricter federal paperwork requirements. I treat long-distance walkthroughs with extra care because errors are harder to correct once the truck is on the highway.
Differences in Documentation Requirements
Long-distance moves require more detailed inventory documentation due to federal regulations governing interstate household goods transport. Local moves typically involve simpler, less formal paperwork.
Differences in Timing and Crew Coordination
Long-distance crews often work on tighter schedules tied to multi-stop routes, which can compress the time available for a thorough walkthrough. Local moves generally allow more flexibility to slow down and double check.
Common Mistakes People Make During the Final Walkthrough
The most common mistake during a final walkthrough is rushing through it because everyone wants the moving day to be over. I understand the instinct, but this is exactly when careful attention matters most.
How to Avoid Rushing the Process
Avoiding a rushed walkthrough starts with building the extra 15 to 20 minutes into the day’s schedule from the beginning, rather than treating it as an afterthought. Treating it as a planned step, not a formality, changes how carefully people actually look.
Preparing for the Final Walkthrough Before Moving Day
Preparing for the final walkthrough before moving day means knowing which rooms and storage spaces to check in advance, so the actual inspection moves quickly and thoroughly. A little preparation the night before saves confusion when the crew is ready to go.
A Simple Pre-Walkthrough Prep Routine
A simple prep routine includes listing every room and storage area in the home the night before, so nothing gets skipped under time pressure the next day. This small step turns a rushed final check into a calm, confident one.
Conclusion
A careful final walkthrough protects belongings, documents the home’s condition, and confirms paperwork matches reality before anyone leaves.
Every move benefits from treating this step as essential, not optional, regardless of distance or home size.
We’ve built our process around this care. Reach out to ASHER MOVERS LOCAL & LONG DISTANCE to move with confidence.
Frequently Asked Questions
How long does a final walkthrough take?
A final walkthrough typically takes 10 to 15 minutes for an average home. Larger properties with basements or attics may take longer.
Who conducts the final walkthrough?
Both the crew lead and the homeowner conduct the final walkthrough together. The homeowner has final say on whether the home is clear.
What should I check during a final walkthrough?
Check every closet, cabinet, attic, basement, and outdoor storage area. Also verify the inventory list and inspect for new damage.
What happens if movers find prohibited items during loading?
Movers set prohibited items aside and won’t load them onto the truck. These items need separate transport or disposal arrangements.
Can I refuse to sign the bill of lading?
Yes, you can refuse to sign until discrepancies are resolved. Signing confirms the inventory and condition notes are accurate.
What if I find damage after the movers have already left?
Filing a claim after departure requires photos and documentation. Resolving issues during the walkthrough itself is always faster.
Does a final walkthrough work differently for long-distance moves?
Yes, long-distance moves require more detailed federal documentation. Local moves typically involve simpler paperwork and more flexible timing.
